


I remember staring at my screen, completely stuck. I had no clue where to start to lean Python Machine Learning, and every article I clicked just confused me more. Sound familiar?
This section will break it down in a way that actually makes sense. No fluff. Just what you need to know, and why it matters.
By the end of this part, you’ll have a clear picture of how to move forward and avoid the confusion I went through.
Let’s keep it simple, practical, and a little fun too. Ready? Let’s dive in.
Table of Contents
Introduction
Why Learn Machine Learning with Python?
I remember googling “how to learn machine learning” and instantly getting overwhelmed. Every guide seemed to assume I already had a PhD or ten years of coding experience. That’s when I found Python—and everything started to click.
Python is beginner-friendly. Its syntax is simple, clean, and readable. You can focus on learning ML concepts instead of wrestling with the code itself.
Even better, it has a huge ecosystem of machine learning libraries. Think Scikit-learn, TensorFlow, and PyTorch. These tools do the heavy lifting so you can build real models faster.
If you’re just getting into ML, Python is the smartest path. You’re not just learning a language—you’re opening a door to powerful tools and endless possibilities.
What This Guide Covers
When I first tried to learn machine learning, I bounced around from one resource to another. Some were too technical. Others skipped the basics completely. I just wanted one clear path from beginner to confident.
That’s exactly what this guide is. A simple, step-by-step roadmap to take you from zero to building real machine learning projects using Python.
We’ll start with Python basics, move through data handling, cover essential ML algorithms, and eventually dive into deep learning and deployment. No experience? No problem. I’ve laid it out stage by stage.
By the end, you’ll not only understand machine learning—you’ll know how to build and share real models. Let’s keep it focused, practical, and actually doable.


Stage 0: Prerequisites for Machine Learning
When I first started, I wanted to jump straight into coding models. But I quickly realized I needed some basics first. Trying to learn machine learning without understanding the fundamentals can be frustrating.
This stage covers the must-know concepts before diving in. You don’t need to be an expert in math or programming yet. Just a comfortable grasp of key ideas like basic algebra, probability, and some programming logic will save you time later.
Getting these foundations right will make learning algorithms and coding much smoother. Think of it as building a strong base before constructing the full machine learning house.
Don’t worry if you feel rusty. I’ll point you to simple resources to refresh these skills. Once you’re ready, the next stages will feel much clearer and easier to follow.
Math You Need (Linear Algebra, Probability, Stats)
When I first looked at the math behind machine learning, it felt like a mountain too steep to climb. Terms like matrices and probability made my head spin. But I quickly learned you only need the basics to get started.
Linear algebra helps you understand how data points relate and move together. Probability and statistics teach you how to make sense of data and handle uncertainty. These math areas form the backbone of many ML algorithms.
You don’t have to master everything right away. A simple grasp of vectors, averages, and probabilities will carry you far. The key is focusing on practical concepts that apply directly to coding models.
If math feels overwhelming, start slow and use beginner-friendly resources. I’ll share some great links and tips to make learning easier. Once you’re comfortable here, the rest of machine learning becomes much clearer.
| Math Topic | What It Is | Why It Matters | Helpful Resource Link |
|---|---|---|---|
| Linear Algebra | Study of vectors, matrices, operations | Organizes and transforms data | Khan Academy Linear Algebra: https://www.khanacademy.org/math/linear-algebra |
| Probability | Study of chance and likelihood | Handles uncertainty in predictions | 3Blue1Brown Probability: https://www.youtube.com/watch?v=uzkc-qNVoOk |
| Statistics | Data summarization and interpretation | Understanding data distributions | Khan Academy Statistics: https://www.khanacademy.org/math/statistics-probability |
| Calculus (Basics) | Study of change and gradients | Optimization in learning algorithms | 3Blue1Brown Calculus: https://www.youtube.com/watch?v=WUvTyaaNkzM |
| Matrix Multiplication | Multiplying matrices | Core of neural networks and data transforms | 3Blue1Brown Matrix Multiplication: https://www.youtube.com/watch?v=XkY2DOUCWMU |
| Set Theory | Basics of sets and relations | Helps understand data grouping and features | Brilliant Set Theory: https://brilliant.org/wiki/set-theory/ |
| Optimization | Finding minima/maxima of functions | Key to training machine learning models | Coursera Optimization: https://www.coursera.org/learn/convex-optimization |
| Discrete Math | Logic, combinatorics, graphs | Useful for algorithms and data structures | MIT OpenCourseWare Discrete Math: https://ocw.mit.edu/courses/mathematics/18-200-principles-of-applied-mathematics-fall-2011/ |
| Probability Distributions | Different types of probability models | Models uncertainty and variability | Khan Academy Distributions: https://www.khanacademy.org/math/statistics-probability/probability-library |
| Linear Regression Theory | Modeling relationships between variables | Foundation of regression algorithms | StatQuest Linear Regression: https://www.youtube.com/watch?v=nk2CQITm_eo |
Programming Basics
When I first started learning machine learning, I underestimated how important programming basics were. I thought I could jump straight into complex models. Spoiler: that didn’t work out well.
Programming basics are your toolbox. They include understanding variables, loops, functions, and how to handle data. Without these, writing or understanding ML code feels like reading a foreign language.
By mastering these fundamentals, you’ll write cleaner code and debug problems faster. Plus, you’ll build confidence to explore more advanced topics smoothly.
In the next section, we’ll dive into the Python language—the most popular choice for machine learning—and how to get comfortable with it step by step.
If you’re new to programming, learning pseudocode can be a game-changer. It’s a simple way to plan your code using plain language before writing actual code. This makes problem-solving easier and your code clearer.
To get started, I recommend this beginner-friendly guide on pseudocode by freeCodeCamp:
https://www.freecodecamp.org/news/how-to-write-pseudocode-for-beginners/
Using pseudocode helps you focus on the logic first, without worrying about syntax. It’s a great skill that will improve your coding and debugging.
Tools to Install
When I first started learning machine learning, setting up my environment felt confusing. There were so many tools and versions to choose from. It took a bit of trial and error to get it right.
This section will guide you through the essential tools you need to install before diving into coding. Having the right setup saves you from headaches later and lets you focus on learning.
You’ll need Python, a code editor like VS Code, and Jupyter Notebooks for running and testing your code easily. We’ll also cover installing important libraries like NumPy and Scikit-learn.
Once you have these tools ready, you’ll be all set to start writing your first machine learning programs with confidence. Next, we’ll dive into the Python basics you’ll use every day.
| Step | Task | Description | Link |
|---|---|---|---|
| 1 | Install Python | Download and install Python. Add it to your system PATH. | https://www.python.org/downloads/ |
| 2 | Install Visual Studio Code | Download and install VS Code, a lightweight code editor. | https://code.visualstudio.com/ |
| 3 | Install Anaconda (Optional) | Bundle of Python and data science tools including Jupyter Notebook. | https://www.anaconda.com/products/distribution |
| 4 | Set Up Jupyter Notebook | If no Anaconda, install Jupyter via pip and launch it. | Run pip install notebook and jupyter notebook command |
| 5 | Install Key Python Libraries | Install essential ML libraries: NumPy, Pandas, Matplotlib, Scikit-learn | Run pip install numpy pandas matplotlib scikit-learn command |

Stage 1: Python Programming for Beginners
When I first opened a Python editor, I was both excited and confused. There were so many commands and syntax rules to learn. But starting with the basics made all the difference.
This stage focuses on getting comfortable with Python’s core concepts—variables, data types, control flow, and functions. These are the building blocks you’ll use every day in machine learning.
By mastering these fundamentals, you’ll be able to write simple programs, manipulate data, and prepare yourself for more complex ML tasks. It’s like learning the alphabet before writing sentences.
Next, we’ll explore practical examples and exercises to help you practice. Don’t worry if it feels tricky at first—everyone starts somewhere, and you’ll improve with each step.
Core Python Concepts
When I first started learning Python, I realized that some key concepts kept showing up again and again. Getting comfortable with these basics helped me write clearer and more effective code.
Core Python concepts include variables, data types, conditionals, loops, and functions. These building blocks form the backbone of almost every program you’ll write, especially in machine learning.
Understanding these fundamentals means you can manipulate data, control the flow of your code, and organize your work efficiently. It’s like learning the grammar of a language before writing essays.
As you get familiar with these ideas, you’ll find it easier to tackle real-world problems and build your own projects. Next, we’ll explore practical examples to help you practice each concept step by step.
If you’re serious about learning Python from scratch, I highly recommend these free courses. They cover everything from the basics to hands-on projects, making your learning journey easier and more fun.
- freeCodeCamp’s Scientific Computing with Python is great for a full beginner-to-intermediate path with a free certification option.
https://www.freecodecamp.org/learn/scientific-computing-with-python/ - Python for Everybody by the University of Michigan on Coursera offers clear explanations and practical exercises. You can audit it for free and get a certificate if you want.
https://www.coursera.org/specializations/python - If you prefer videos, check out Automate the Boring Stuff with Python on YouTube by freeCodeCamp. It’s packed with real-world projects that keep you engaged.
https://www.youtube.com/watch?v=WV6zZfSYR8k - Microsoft also has a hands-on interactive beginner course called Introduction to Python which is perfect if you like learning by doing.
https://learn.microsoft.com/en-us/training/paths/python-first-steps/
Pick the one that suits your style best and dive in. Trust me, these courses will build a solid Python foundation to launch your machine learning journey.
Writing and Running Code (Jupyter / Colab)
When I first started coding for machine learning, I struggled with managing scripts and outputs. That’s when I discovered Jupyter Notebooks and Google Colab—they changed everything.
These tools let you write and run code in small chunks called “cells.” You get instant feedback, making it easier to test ideas and fix mistakes quickly. Plus, they support text, images, and charts all in one place.
Google Colab is especially great because it runs in your browser and offers free access to GPUs, which is awesome for machine learning projects. Jupyter works locally on your computer and gives you more control.
Using these environments helps you stay organized and focused. Once you get comfortable with them, coding feels much more interactive and fun. Up next, I’ll show you how to set up and use these tools efficiently.
Mini Projects to Build
| Project Name | Skills Improved | Libraries Used | YouTube Tutorial Link |
|---|---|---|---|
| Calculator App | Functions, user input, logic | None | How to Build a Simple Python Calculator App |
| Number Guessing Game | Loops, conditionals, randomness | None | Let’s code a Python NUMBER GUESSING GAME! |
| To-Do List CLI | Lists, file handling, loops | None | Command Line To Do List App Python coding tutorial |
| Contact Book | Dictionaries, file I/O | None | Contact Book Project in Python for Beginners |
| Mad Libs Generator | String manipulation, input | None | Madlibs Python Tutorial |
Stage 2: Data Manipulation & Visualization
When I first started working with data, I quickly realized raw numbers alone don’t tell the full story. You need to clean, shape, and visualize data to truly understand it.
In this stage, you’ll learn how to manipulate data using libraries like Pandas and NumPy. These tools let you filter, transform, and organize data easily—skills that are essential before feeding data into machine learning models.
Visualization comes next. Using Matplotlib or Seaborn, you’ll create charts that reveal patterns and insights at a glance. Seeing your data visually helps you catch trends and outliers you might miss otherwise.
Mastering these skills will give you a solid foundation to explore datasets confidently. Next up, we’ll dive into some hands-on examples to practice these techniques in action.
Example Code :
import pandas as pd

# Sample DataFrame
data = {
    'Name': ['Alice', 'Bob', 'Charlie', 'David', 'Eva'],
    'Age': [25, 30, 35, 40, 22],
    'Department': ['HR', 'IT', 'IT', 'HR', 'Finance'],
    'Salary': [50000, 60000, 65000, 52000, 48000]
}
df = pd.DataFrame(data)

# Filtering: Select rows where Department is 'IT'
it_dept = df[df['Department'] == 'IT']
print(it_dept)

# Grouping: Average salary by Department
avg_salary = df.groupby('Department')['Salary'].mean()
print(avg_salary)
NumPy: Working with Arrays
When I first started with machine learning, I quickly learned that handling data efficiently is key. That’s where NumPy comes in—it’s the foundation for numerical computing in Python.
NumPy’s main strength is its powerful array object. Unlike regular Python lists, NumPy arrays are faster and use less memory. They let you perform math operations on entire datasets with just a few lines of code.
With NumPy, you can do everything from simple arithmetic to complex matrix operations. It’s a must-know tool before diving deeper into data science or machine learning.
To really master NumPy, I found this YouTube tutorial incredibly helpful:
NumPy Tutorial for Beginners by freeCodeCamp
Quick NumPy Code Snippet
import numpy as np

# Create a 1D array
arr = np.array([1, 2, 3, 4, 5])

# Basic operations
print("Original array:", arr)
print("Add 5:", arr + 5)
print("Multiply by 2:", arr * 2)

# Create a 2D array (matrix)
matrix = np.array([[1, 2], [3, 4]])
print("Matrix:\n", matrix)

# Matrix multiplication
result = np.dot(matrix, matrix)
print("Matrix multiplied by itself:\n", result)
Important NumPy Facts
| Feature | Description |
|---|---|
| Fast and Efficient | Uses optimized C code under the hood |
| Multidimensional | Supports arrays of any dimension |
| Broadcasting | Allows math operations on arrays of different shapes |
| Rich Functionality | Offers many math, statistical, and linear algebra functions |
| Widely Used | Backbone of many data science and ML libraries |
Pandas: DataFrames & Cleaning
When I first started working with real-world data, I quickly realized it’s rarely neat or ready to use. That’s where Pandas comes in. It’s the go-to library for handling messy datasets with ease.
Pandas introduces DataFrames—a powerful table-like data structure that feels like working with spreadsheets but much more flexible. You can easily filter, sort, and modify your data to fit your needs.
Cleaning data is crucial. With Pandas, you can find missing values, fill them, drop unwanted rows, and even transform data formats—all in just a few lines of code.
Mastering these tools will save you hours of frustration and prepare your data perfectly for analysis or machine learning.
To really master Pandas, I found this YouTube tutorial incredibly helpful:
Pandas Tutorial for Beginners by Corey Schafer
Quick Pandas Code Snippet
import pandas as pd

# Sample messy data
data = {
    'Name': ['Alice', 'Bob', None, 'David', 'Eva'],
    'Age': [25, 30, 35, None, 22],
    'Department': ['HR', 'IT', 'IT', 'HR', None]
}
df = pd.DataFrame(data)

# Check for missing values
print(df.isnull())

# Fill missing values
df['Age'].fillna(df['Age'].mean(), inplace=True)
df['Name'].fillna('Unknown', inplace=True)
df['Department'].fillna('Unknown', inplace=True)

# Drop rows with any remaining missing data
df.dropna(inplace=True)

print("\nCleaned DataFrame:")
print(df)
Important Pandas Facts
| Feature | Description |
|---|---|
| DataFrames | 2D labeled data structure, like a spreadsheet |
| Handling Missing Data | Functions like fillna(), dropna() to clean data |
| Data Manipulation | Easy filtering, sorting, grouping |
| Integration | Works well with NumPy, Matplotlib, and ML libraries |
| Performance | Efficient for large datasets using optimized code |
Visualizing Data with Matplotlib & Seaborn
When I started exploring data, I quickly realized that numbers alone don’t tell the full story. Visualization helps bring data to life and makes patterns easier to spot.
Matplotlib is the classic Python library for creating charts and graphs. It gives you full control over every element in your plots. Seaborn builds on Matplotlib to offer prettier, more informative statistical graphics with less code.
Using these libraries, you can create line plots, bar charts, histograms, heatmaps, and more. Visualizing your data helps you understand trends, spot outliers, and communicate insights effectively.
If you want to master data visualization, this YouTube tutorial is a great place to start:
Python Data Visualization with Matplotlib & Seaborn by Corey Schafer
Quick Visualization Code Snippet
import matplotlib.pyplot as plt
import seaborn as sns
import pandas as pd

# Sample data
data = {'Category': ['A', 'B', 'C', 'D'],
        'Values': [23, 45, 56, 78]}
df = pd.DataFrame(data)

# Matplotlib bar chart
plt.figure(figsize=(6,4))
plt.bar(df['Category'], df['Values'], color='skyblue')
plt.title('Matplotlib Bar Chart')
plt.show()

# Seaborn barplot
plt.figure(figsize=(6,4))
sns.barplot(x='Category', y='Values', data=df, palette='viridis')
plt.title('Seaborn Barplot')
plt.show()
Important Visualization Facts
| Feature | Description |
|---|---|
| Matplotlib | Highly customizable, foundational plotting library |
| Seaborn | Built on Matplotlib, provides attractive default styles |
| Plot Types | Supports line, bar, scatter, histogram, heatmap, etc. |
| Integration | Works well with Pandas and NumPy data structures |
| Use Cases | Exploratory data analysis and presentation-ready charts |


Stage 3: Core Machine Learning Concepts
When I first dipped my toes into machine learning, the sheer number of concepts felt overwhelming. But breaking them down helped me see the bigger picture clearly.
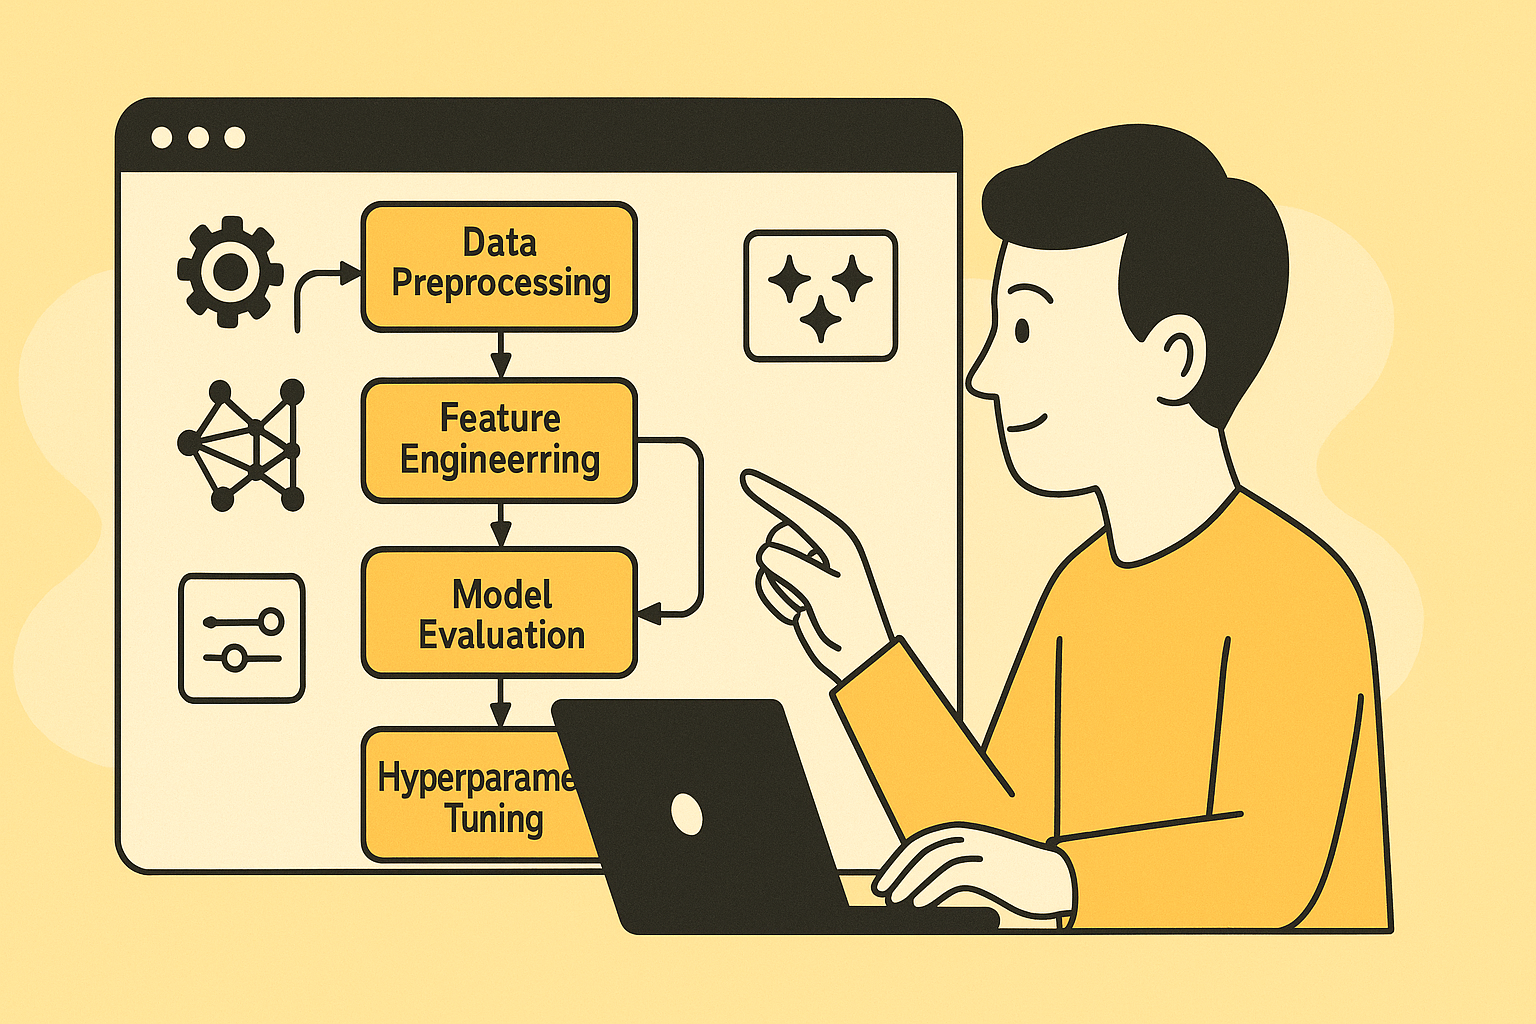
This stage is all about understanding the fundamental ideas behind machine learning. Concepts like supervised vs unsupervised learning, overfitting, underfitting, and model evaluation metrics become your toolkit.
Grasping these basics lets you build better models and avoid common pitfalls. You’ll learn how algorithms learn from data and how to measure their success accurately.
By the end of this stage, you’ll be confident explaining key terms and ready to dive into actual model building.
Supervised vs Unsupervised Learning
When I first heard about supervised and unsupervised learning, the terms sounded confusing. But once I broke them down, it all made sense.
Supervised learning means teaching a model with labeled data—where the answers are already known. Think of it like a teacher giving you questions and answers to learn from.
Unsupervised learning, on the other hand, works with unlabeled data. The model tries to find hidden patterns or groups on its own. It’s like exploring a puzzle without knowing the final picture.
Understanding the difference helps you choose the right approach for your project. In the next sections, I’ll walk you through examples and when to use each type.
To help you get started, here’s a simple table of key supervised and unsupervised learning concepts with useful resources to explore,
Train/Test Split, Metrics, Overfitting
When I started training machine learning models, I quickly learned that just building a model isn’t enough. You need to know how well it performs and whether it will work on new data.
That’s where the train/test split comes in. You divide your data into two parts: one to train the model, and one to test it. This helps check if your model can generalize well beyond what it has seen.
Next, evaluating with metrics like accuracy, precision, and recall tells you how good your model is. Each metric shines in different scenarios, so knowing when to use what is crucial.
Finally, beware of overfitting—when your model learns the training data too well, including its noise, and performs poorly on new data. Recognizing this early can save you a lot of headaches.
In this section, I’ll share tips and simple examples to make these concepts clear and practical for you.
Evaluation Metrics Comparison
| Metric | What it Measures | When to Use |
|---|---|---|
| Accuracy | Percentage of correct predictions | When classes are balanced |
| Precision | Correct positive predictions / total predicted positives | When false positives are costly |
| Recall | Correct positive predictions / total actual positives | When missing positives is costly |
| F1 Score | Harmonic mean of precision and recall | When you want a balance of precision and recall |
| ROC AUC | How well model distinguishes classes | For binary classification, especially imbalanced data |
Train/Test Split Code Example (scikit-learn)
from sklearn.model_selection import train_test_split

# Example data
X = [[1], [2], [3], [4], [5]]
y = [0, 0, 1, 1, 1]

# Split data: 80% train, 20% test
X_train, X_test, y_train, y_test = train_test_split(X, y, test_size=0.2, random_state=42)

print("Train data:", X_train)
print("Test data:", X_test)
Helpful Resources on Overfitting
- Video: What is Overfitting in Machine Learning? | StatQuest
- Article: Overfitting and Underfitting in Machine Learning
Scikit-Learn: Your First ML Models
When I first started learning machine learning, Scikit-Learn made the process surprisingly smooth. It’s a beginner-friendly Python library that helps you build models quickly and test your ideas easily.
Here’s a quick guide to get you started with your first models. You’ll see how to train, predict, and evaluate with just a few lines of code.
Recommended YouTube Course
Scikit-Learn Full Course for Beginners – FreeCodeCamp
This 5-hour course covers everything from basics to building real models step-by-step.
Key Facts about Scikit-Learn
| Metric | Description |
|---|---|
| Easy to use | Simple API for quick prototyping |
| Wide range | Supports classification, regression, clustering, and more |
| Built on | Uses NumPy, SciPy, and matplotlib for numerical operations and plotting |
| Open source | Free and actively maintained by contributors worldwide |
| Integrates well | Works with Pandas and other data tools seamlessly |
Sample Code Snippet: Training a Decision Tree Classifier
from sklearn.datasets import load_iris
from sklearn.model_selection import train_test_split
from sklearn.tree import DecisionTreeClassifier
from sklearn.metrics import accuracy_score

# Load sample dataset
iris = load_iris()
X, y = iris.data, iris.target

# Split dataset
X_train, X_test, y_train, y_test = train_test_split(X, y, test_size=0.3, random_state=42)

# Initialize and train model
model = DecisionTreeClassifier()
model.fit(X_train, y_train)

# Make predictions
y_pred = model.predict(X_test)

# Evaluate accuracy
print(f"Accuracy: {accuracy_score(y_test, y_pred):.2f}")
Try running this yourself to see how easy it is to get started with Scikit-Learn. Once you’re comfortable, you can explore more advanced models and tuning techniques.
Beginner ML Algorithms Explained Simply
When I first dove into machine learning, the sheer number of algorithms felt overwhelming. But breaking them down into simple, clear ideas really helped me get comfortable.
In this section, I’ll explain a few core beginner algorithms like Linear Regression, Decision Trees, and K-Nearest Neighbors. You’ll see how each works, when to use them, and why they matter.
Understanding these basics will build your confidence and prepare you for more advanced topics. Plus, you’ll get a solid grasp of how machines learn from data, making your journey smoother.
Ready to unpack these algorithms? Let’s start with easy, practical explanations that anyone can follow.
Starter Projects to Try
Stage 4: Intermediate Machine Learning
Once you’ve tackled the basics, it’s time to level up. At this stage, things get more exciting, and just a bit more complex. You’ll move beyond linear models and start working with deeper algorithms, better data handling, and smarter evaluation strategies.
The key shift here? You stop guessing and start tuning. That means diving into model optimization, handling real-world data issues like imbalance, and experimenting with more advanced techniques like ensemble models.
Expect to roll up your sleeves. You’ll need patience, some trial-and-error, and curiosity. But trust me, this is where the fun really begins.
Let’s take a look at what you should be exploring now:
Feature Engineering & Pipelines
Ever felt like your model’s performance just hit a wall? I’ve been there too. And most of the time, it wasn’t the model—it was the data.
Feature engineering is where you make your data smarter. It’s about picking, tweaking, and even creating features that help your model understand the problem better. Things like scaling, encoding, or building new columns from existing ones can make a big difference.
But here’s the cool part: you don’t have to repeat the same steps every time. That’s where pipelines come in. They bundle your preprocessing and model steps into one clean, reusable process.
Once you start using pipelines, your code becomes way more organized, and your future self will thank you.
Sample Pipeline in Scikit-Learn
from sklearn.pipeline import Pipeline
from sklearn.preprocessing import StandardScaler
from sklearn.ensemble import RandomForestClassifier

pipe = Pipeline([
    ('scaler', StandardScaler()),
    ('model', RandomForestClassifier())
])

pipe.fit(X_train, y_train)
Why This Matters
| Feature Engineering Task | What It Helps With |
|---|---|
| Scaling (e.g., StandardScaler) | Normalizes data for better model performance |
| Encoding (e.g., OneHotEncoder) | Converts categories into usable numbers |
| Feature Creation | Adds new insights for the model |
| Feature Selection | Removes noise, improves accuracy |
| Pipelines | Keeps preprocessing clean & repeatable |
Great Visual Resources
Feature Engineering Crash Course
Scikit-Learn Pipelines Simplified
Kaggle: Feature Engineering for ML
Cross-Validation & Model Evaluation
I used to train a model, check the accuracy, and move on. Sound familiar? But that simple approach often gives a false sense of how good the model really is.
That’s where cross-validation comes in. Instead of relying on a single train-test split, we train and test the model multiple times on different chunks of the data. This gives a much more reliable estimate of performance.
And then there’s model evaluation. Accuracy isn’t always enough. Depending on your problem, you might care more about precision, recall, or F1-score. Choosing the right metric is key to knowing whether your model is actually doing its job.
Once I started cross-validating and picking the right metrics, my models got more trustworthy—and I stopped fooling myself with inflated scores.
Code Example: K-Fold Cross-Validation
from sklearn.model_selection import cross_val_score
from sklearn.ensemble import RandomForestClassifier

model = RandomForestClassifier()
scores = cross_val_score(model, X, y, cv=5)

print("Cross-validated scores:", scores)
print("Average accuracy:", scores.mean())
Common Evaluation Metrics
| Metric | Measures What? | Good For |
|---|---|---|
| Accuracy | % of correct predictions | Balanced classes |
| Precision | % of predicted positives that were correct | When false positives matter |
| Recall | % of actual positives that were caught | When false negatives matter |
| F1 Score | Harmonic mean of precision and recall | Imbalanced classes |
| ROC AUC | Model’s ability to distinguish between classes | Binary classification problems |
Helpful Videos & Articles
- Cross Validation in Machine Learning
A clear visual explanation using real-world examples. - Model Evaluation Metrics Explained
Great breakdown of precision, recall, F1, and when to use them. - Scikit-Learn Docs: Model Evaluation
Hyperparameter Tuning (GridSearchCV)
I’ll be honest—when I first heard “hyperparameter tuning,” I thought it was some advanced rocket science. But it’s really just about finding the best combo of settings for your model to perform at its best.
Instead of guessing which parameters work (like how many trees in a random forest), we can use GridSearchCV. It tries out every possible combination we give it—and tells us which one wins.
This step can take some time, but trust me, it’s worth it. It’s like trying on different outfits before an interview—you want the best fit before making the big move.
Sample Code: GridSearchCV in Action
from sklearn.model_selection import GridSearchCV
from sklearn.ensemble import RandomForestClassifier

params = {
    'n_estimators': [50, 100, 150],
    'max_depth': [None, 5, 10]
}

grid = GridSearchCV(RandomForestClassifier(), params, cv=5)
grid.fit(X_train, y_train)

print("Best parameters:", grid.best_params_)
print("Best score:", grid.best_score_)
Why Hyperparameter Tuning Matters
| What It Improves | Example Parameters | Why It Helps |
|---|---|---|
| Model accuracy | max_depth, n_estimators | Prevents underfitting/overfitting |
| Training time | n_jobs, max_features | Speeds up large models |
| Generalization to new data | C, gamma, alpha | Reduces overfitting risk |
Learn More with These Resources
- GridSearchCV Explained Simply (YouTube) – A great visual guide with scikit-learn
- Scikit-Learn’s GridSearchCV Docs
- Hyperparameter Tuning Blog Guide
Working with Imbalanced Data
Imbalanced datasets can cause your model to favor the majority class. For example, if 95% of your data is from one class, the model might just predict that class every time and still appear accurate.
This happens a lot in cases like fraud detection or medical diagnosis, where the minority class is actually the important one. So, we need special techniques to help the model learn from those rare but critical examples.
Techniques You Can Try
| Method | Description |
|---|---|
| Resampling | Upsample the minority or downsample the majority |
| SMOTE | Generates synthetic samples for the minority class |
| Class Weights | Applies higher penalties to misclassifying minority samples |
| Anomaly Models | Uses one-class classifiers designed for rare events |
Code Snippet: Using Class Weights
from sklearn.ensemble import RandomForestClassifier

model = RandomForestClassifier(class_weight='balanced')
model.fit(X_train, y_train)
Resources to Explore
- YouTube: Handling Imbalanced Datasets
- SMOTE Documentation – imbalanced-learn
- Kaggle: Practical Tips for Imbalanced Data
Using these methods will help your model focus on the rare but important cases and improve its real-world effectiveness.
XGBoost & LightGBM Basics
When you start diving deeper into machine learning, XGBoost and LightGBM quickly become your best friends. Both are powerful gradient boosting frameworks that help build strong predictive models efficiently and accurately.
XGBoost is known for its speed and performance, while LightGBM excels at handling large datasets with lower memory usage. They both handle missing data well and support parallel processing, making training faster.
Key Features
| Feature | XGBoost | LightGBM |
|---|---|---|
| Speed | Fast | Faster on large data |
| Memory Usage | Moderate | Low |
| Handling Missing Data | Yes | Yes |
| Parallel Processing | Yes | Yes |
| Support for Categorical Features | Limited | Native support |
Code Snippet: Basic XGBoost Model
import xgboost as xgb
from sklearn.datasets import load_boston
from sklearn.model_selection import train_test_split

data = load_boston()
X_train, X_test, y_train, y_test = train_test_split(data.data, data.target, test_size=0.2)

model = xgb.XGBRegressor(objective='reg:squarederror', n_estimators=100)
model.fit(X_train, y_train)
Resources to Explore
- YouTube: XGBoost Tutorial for Beginners
- LightGBM Official Documentation
- Comprehensive Guide to Gradient Boosting
Mastering these tools will significantly boost your model’s power and efficiency as you tackle more complex datasets.
Real-World Medium-Level Projects
Once you’re comfortable with core machine learning concepts and tools, it’s time to level up with real-world projects. These projects help you apply what you’ve learned and prepare you for more complex challenges.
Working on medium-level projects teaches you how to handle messy data, tune models, and interpret results in practical scenarios. It’s also a great way to build your portfolio with examples that show off your skills.
Project Ideas with Skills and Libraries
| Project | Skills Improved | Libraries |
|---|---|---|
| Customer Churn Prediction | Data cleaning, classification, evaluation | Pandas, scikit-learn, XGBoost |
| House Price Prediction | Regression, feature engineering | Pandas, scikit-learn, LightGBM |
| Sentiment Analysis on Tweets | Text preprocessing, NLP basics | NLTK, scikit-learn, Pandas |
| Sales Forecasting | Time series analysis, visualization | Pandas, statsmodels, Matplotlib |
Resources to Explore
- YouTube: Machine Learning Projects for Beginners
- Kaggle: Real-World Datasets for Practice
- GitHub: Medium Machine Learning Projects
Starting these projects will sharpen your skills and make you more confident in building real-world ML solutions.

Stage 5: Deep Learning Foundations
At this stage, you start exploring the world of deep learning—the branch of machine learning inspired by how the human brain works. Deep learning helps solve complex problems like image recognition, natural language processing, and more.
You’ll learn about neural networks, how they’re built, and how to train them. Understanding these basics will open doors to advanced AI projects and exciting applications.
Core Topics to Focus On
| Topic | What You’ll Learn |
|---|---|
| Neural Networks Basics | Structure of neurons, layers, activation functions |
| Backpropagation & Training | How networks learn from data |
| Convolutional Neural Networks (CNNs) | Image data processing |
| Recurrent Neural Networks (RNNs) | Sequence data like text or time series |
| Frameworks | Using TensorFlow or PyTorch for building models |
Resources to Explore
- Deep Learning Specialization by Andrew Ng (Coursera)
- YouTube: Deep Learning Fundamentals
- PyTorch Official Tutorials
- TensorFlow Tutorials
Diving into deep learning takes patience, but it’s hugely rewarding. As you get comfortable, you’ll start creating powerful AI models that can learn and make decisions on their own.
What is a Neural Network?
Neural networks are the foundation of deep learning. They mimic how our brains work by connecting simple units called neurons into layers. Each neuron takes input, processes it, and passes the output forward. Through training, these connections adjust to recognize patterns in data like images, text, or sounds.
This ability to learn complex patterns makes neural networks powerful for many AI tasks, from voice assistants to self-driving cars. Understanding how these networks operate will give you the groundwork for diving deeper into deep learning.
Here’s a quick look at the main components:
| Component | Description |
|---|---|
| Input Layer | Receives raw data to be processed |
| Hidden Layers | Intermediate layers that extract features |
| Neurons | Basic units performing computations |
| Weights | Values that adjust the strength of connections |
| Activation Function | Adds non-linearity to help the network learn complex patterns |
| Output Layer | Produces the final prediction or classification |
Simple Python Example: Creating a Neural Network with Keras
from tensorflow.keras.models import Sequential
from tensorflow.keras.layers import Dense

model = Sequential()
model.add(Dense(10, activation='relu', input_shape=(5,)))
model.add(Dense(1, activation='sigmoid'))

model.compile(optimizer='adam', loss='binary_crossentropy', metrics=['accuracy'])

print(model.summary())
Resources to Explore
- YouTube: Neural Networks Demystified by Welch Labs
- Article: Neural Networks Explained — Towards Data Science
- Interactive Tutorial: 3Blue1Brown’s Neural Networks
TensorFlow vs PyTorch: Which One to Pick?
Choosing between TensorFlow and PyTorch can feel overwhelming at first. Both are powerful deep learning frameworks widely used by professionals and researchers. The key is to understand their strengths and what fits your style or project needs best.
TensorFlow is known for its production-ready features and scalability. It has strong support for deploying models in various environments, like mobile or web apps. PyTorch, on the other hand, shines with its dynamic computation graph, making it more intuitive and easier for experimentation and research.
Here’s a quick comparison:
| Feature | TensorFlow | PyTorch |
|---|---|---|
| Ease of Use | Steeper learning curve | More Pythonic and beginner-friendly |
| Computation Graph | Static (TensorFlow 2 introduced eager mode) | Dynamic (eager execution by default) |
| Deployment | Great for production & mobile apps | Increasing support, growing rapidly |
| Community & Ecosystem | Larger, more mature ecosystem | Growing fast, popular in research |
| Visualization Tools | TensorBoard | TensorBoard support via plugins |
Sample Code Snippet: Defining a simple neural network layer in both
TensorFlow (Keras):
import tensorflow as tf
model = tf.keras.Sequential([
    tf.keras.layers.Dense(10, activation='relu', input_shape=(5,)),
    tf.keras.layers.Dense(1, activation='sigmoid')
])
PyTorch:
import torch.nn as nn
class SimpleNN(nn.Module):
    def __init__(self):
        super(SimpleNN, self).__init__()
        self.fc1 = nn.Linear(5, 10)
        self.relu = nn.ReLU()
        self.fc2 = nn.Linear(10, 1)
        self.sigmoid = nn.Sigmoid()
    def forward(self, x):
        x = self.relu(self.fc1(x))
        x = self.sigmoid(self.fc2(x))
        return x
model = SimpleNN()
Resources to Learn More
- YouTube: TensorFlow vs PyTorch by deeplizard
- Article: TensorFlow vs PyTorch by Analytics Vidhya
- Official Docs: TensorFlow, PyTorch
Choosing either is a great step. Your decision can depend on your project goals, preferred workflow, and future deployment needs.
CNNs, RNNs, and More
When diving deeper into deep learning, you’ll encounter different types of neural networks designed for specific tasks. CNNs and RNNs are two of the most important, but there are others too. Understanding their unique strengths will help you choose the right tool for your problem.
Convolutional Neural Networks (CNNs) are excellent for image-related tasks. They use convolutional layers to detect patterns like edges, shapes, or textures. This makes them ideal for computer vision problems such as image classification, object detection, and even medical imaging.
Recurrent Neural Networks (RNNs) specialize in sequential data, like time series or language. They have a “memory” that helps them understand context in sequences, making them great for tasks like speech recognition, language modeling, and text generation.
There are also variants like Long Short-Term Memory (LSTM) and Gated Recurrent Units (GRU) that improve upon basic RNNs by better handling long-range dependencies.
Here’s a quick comparison:
| Network Type | Best For | Key Feature |
|---|---|---|
| CNN | Images, videos | Spatial pattern detection |
| RNN | Sequences, time-series | Capturing temporal dependencies |
| LSTM | Long sequences (text, speech) | Handling long-term memory |
| GRU | Similar to LSTM | Simplified memory unit |
Sample Code Snippet: Simple CNN Layer with PyTorch
import torch.nn as nn

class SimpleCNN(nn.Module):
    def __init__(self):
        super(SimpleCNN, self).__init__()
        self.conv1 = nn.Conv2d(in_channels=3, out_channels=16, kernel_size=3)
        self.relu = nn.ReLU()
    def forward(self, x):
        x = self.relu(self.conv1(x))
        return x
Resources to Explore
- YouTube: Deep Learning Specialization – CNNs by Andrew Ng
- Article: Understanding RNN, LSTM, and GRU
- PyTorch Docs: CNN Tutorial
Understanding these networks will give you the tools to handle images, text, or time-series data effectively. It’s a great step towards mastering deep learning applications.
Deep Learning Projects for Beginners
Starting with deep learning projects can feel intimidating, but picking the right beginner-friendly projects makes all the difference. These projects help you apply concepts like neural networks, CNNs, and RNNs practically, building your confidence and skills step-by-step.
Here are some project ideas to get you started:
| Project Name | Skills Learned | Libraries/Tools | Description |
|---|---|---|---|
| Handwritten Digit Classifier | CNNs, Image Processing | TensorFlow, Keras, PyTorch | Classify digits from the MNIST dataset |
| Sentiment Analysis | RNNs, NLP Basics | TensorFlow, Keras, NLTK | Analyze text to predict sentiment |
| Image Caption Generator | CNN + RNNs, Sequence Modeling | TensorFlow, Keras | Generate captions for images |
| Simple Chatbot | RNNs, Sequence Prediction | TensorFlow, Keras | Build a rule-based or simple sequence model chatbot |
Sample Code Snippet: Training a Simple CNN on MNIST (Keras)
from tensorflow.keras.datasets import mnist
from tensorflow.keras.models import Sequential
from tensorflow.keras.layers import Conv2D, Flatten, Dense
from tensorflow.keras.utils import to_categorical

# Load data
(x_train, y_train), (x_test, y_test) = mnist.load_data()
x_train = x_train.reshape(-1, 28, 28, 1) / 255.0
x_test = x_test.reshape(-1, 28, 28, 1) / 255.0
y_train = to_categorical(y_train)
y_test = to_categorical(y_test)

# Build model
model = Sequential([
    Conv2D(32, kernel_size=3, activation='relu', input_shape=(28,28,1)),
    Flatten(),
    Dense(10, activation='softmax')
])

model.compile(optimizer='adam', loss='categorical_crossentropy', metrics=['accuracy'])
model.fit(x_train, y_train, epochs=3, validation_data=(x_test, y_test))
Resources to Explore
- YouTube: Deep Learning Projects for Beginners – freeCodeCamp
- Article: 10 Deep Learning Project Ideas for Beginners
- GitHub: Awesome Deep Learning Projects
Starting with these projects lets you see your code come alive and makes complex concepts feel approachable. Give one a try, and watch your skills grow.
Stage 6: Real-World Projects & Deployment
At this stage, you’re ready to tackle full-fledged machine learning projects and get them out into the world. Real-world projects help you combine everything you’ve learned—from data handling to model building—and introduce new skills like deployment and monitoring.
Why This Stage Matters
Deploying a model means making it accessible for others to use, whether through a web app, API, or embedded system. It’s the bridge between theory and real impact. Plus, real projects challenge you to handle messy data, optimize performance, and ensure reliability.
Key Areas to Focus On
| Area | What You Learn | Tools/Libraries | Description |
|---|---|---|---|
| Model Deployment | Packaging models, APIs, cloud deployment | Flask, FastAPI, Docker, AWS, Heroku | Serve your model via web services |
| Monitoring & Logging | Track model performance, detect drift | Prometheus, Grafana, ELK stack | Ensure your model stays accurate over time |
| End-to-End Pipeline | Automate data collection, training, deployment | Apache Airflow, Kubeflow, MLflow | Build scalable ML workflows |
| Containerization | Isolate environments for reproducibility | Docker, Kubernetes | Simplify deployment and scaling |
Sample Code Snippet: Simple Flask API to Serve a Model
from flask import Flask, request, jsonify
import pickle

app = Flask(__name__)

# Load pretrained model
model = pickle.load(open('model.pkl', 'rb'))

@app.route('/predict', methods=['POST'])
def predict():
    data = request.get_json(force=True)
    prediction = model.predict([data['features']])
    return jsonify({'prediction': prediction[0]})

if __name__ == '__main__':
    app.run(debug=True)
Resources to Explore
- YouTube: Deploy Machine Learning Model with Flask | Python API
- Article: How to Deploy Machine Learning Models
- GitHub: ML Deployment Examples
Jumping into real-world projects and deployment is where your skills truly shine. It’s challenging but rewarding, your models go from experiments to tools people can actually use.
Building an ML API (Flask/FastAPI)
Creating an API for your machine learning model is a crucial step in making it accessible to others. Whether you want to integrate your model into a web app or allow other programs to use it, an API acts as the bridge.
Why build an ML API?
An API lets you send data to your model and get predictions back in real-time. It wraps your trained model in a simple interface that anyone can use, without needing to understand the inner workings.
Popular frameworks
- Flask is lightweight and easy to learn. It’s perfect for simple APIs.
- FastAPI is faster and supports automatic documentation. Great if you want modern features out of the box.
Sample Code Snippet: Simple Flask API
from flask import Flask, request, jsonify
import pickle

app = Flask(__name__)
model = pickle.load(open('model.pkl', 'rb'))

@app.route('/predict', methods=['POST'])
def predict():
    data = request.get_json(force=True)
    prediction = model.predict([data['features']])
    return jsonify({'prediction': prediction[0]})

if __name__ == '__main__':
    app.run(debug=True)
Sample Code Snippet: Simple FastAPI API
from fastapi import FastAPI
from pydantic import BaseModel
import pickle

app = FastAPI()
model = pickle.load(open('model.pkl', 'rb'))

class InputData(BaseModel):
    features: list

@app.post('/predict')
def predict(data: InputData):
    prediction = model.predict([data.features])
    return {'prediction': prediction[0]}
Resources to explore
- YouTube: Build a Machine Learning API with Flask
- YouTube: FastAPI Tutorial – Build a Modern API
- Article: Deploy ML Model with FastAPI
Building an API is a game changer, it makes your models usable by real people and systems. Once you master this, the possibilities expand exponentially.
Exporting and Saving Models
After training your machine learning model, the next important step is saving it. This lets you reuse your model without retraining every time, saving time and resources.
Why save models?
Saving allows you to deploy your model in applications or share it with others. You can also keep snapshots of different versions for comparison or rollback.
Common formats and tools
- Pickle: The classic Python tool for saving almost any object, including models.
- Joblib: Optimized for saving larger numpy arrays efficiently.
- ONNX: A format to make your model portable across different frameworks.
- TensorFlow SavedModel: A directory format that saves the entire TensorFlow model.
Sample Code Snippet: Saving and Loading with Pickle
import pickle

# Save the model
with open('model.pkl', 'wb') as f:
    pickle.dump(model, f)

# Load the model
with open('model.pkl', 'rb') as f:
    loaded_model = pickle.load(f)
Sample Code Snippet: Saving and Loading with Joblib
import joblib

# Save the model
joblib.dump(model, 'model.joblib')

# Load the model
loaded_model = joblib.load('model.joblib')
Resources to explore
- YouTube: Saving and Loading Machine Learning Models in Python
- Article: How to Save and Load Models in Scikit-Learn
- TensorFlow Guide: Save and Load Models
Properly saving your models ensures your work lasts beyond training. It’s a fundamental step before deployment or sharing.
Deployment with Streamlit, Docker, or Heroku
Deploying your machine learning model lets others interact with it easily. Whether it’s a web app, an API, or a demo, deployment makes your project accessible.
Streamlit is a fantastic tool for quickly building interactive web apps using Python. It requires minimal code and is perfect for data apps or prototypes.
Docker helps you package your entire app and environment into a container. This ensures your project runs consistently anywhere—whether on your computer, a server, or the cloud.
Heroku is a cloud platform that makes deploying apps simple, especially for beginners. You can host your Docker container or Python app there with minimal hassle.
Benefits of these tools
- Streamlit: Rapid prototyping with beautiful UI and easy Python integration.
- Docker: Portable, consistent environments across all platforms.
- Heroku: Managed hosting with automatic scaling and easy deployment.
Sample Code Snippet: Simple Streamlit app to load a model
import streamlit as st
import pickle

# Load model
with open('model.pkl', 'rb') as f:
    model = pickle.load(f)

# User input
user_input = st.number_input('Enter a value')

# Predict and show result
prediction = model.predict([[user_input]])
st.write(f'Prediction: {prediction[0]}')
Resources to Explore
- YouTube: Streamlit Tutorial for Beginners
- YouTube: Docker Tutorial for Beginners
- Article: Deploying Python Apps on Heroku
Using these tools, you can easily share your machine learning projects with the world. Whether for testing or production, deployment is the final step to make your work shine.
End-to-End ML Application Examples
Building an end-to-end machine learning application means taking your project from data all the way to deployment. It’s about combining data processing, model training, and user interaction into one smooth package.
These examples show how real projects come together. They usually include:
- Data collection and cleaning
- Feature engineering and model training
- Model evaluation and tuning
- Deployment through web apps or APIs
Working on end-to-end projects helps you understand how each step fits together. It also prepares you for real-world challenges like scaling, user input handling, and performance.
Example Projects
| Project Name | Description | Tools/Libraries | GitHub Link |
|---|---|---|---|
| Sentiment Analysis App | Classifies text reviews as positive or negative | Python, Pandas, Scikit-learn, Streamlit | https://github.com/ageron/handson-ml2 |
| House Price Predictor | Predicts real estate prices based on features | Python, Pandas, XGBoost, Flask | https://github.com/llSourcell/House_Price_Prediction |
| Image Classifier | Classifies images using CNN | Python, TensorFlow, FastAPI | https://github.com/keras-team/keras-io |
Sample Code Snippet: Flask app to serve a model
from flask import Flask, request, jsonify
import pickle
import numpy as np

app = Flask(__name__)

# Load trained model
with open('model.pkl', 'rb') as f:
    model = pickle.load(f)

@app.route('/predict', methods=['POST'])
def predict():
    data = request.json
    features = np.array(data['features']).reshape(1, -1)
    prediction = model.predict(features)
    return jsonify({'prediction': prediction[0].tolist()})

if __name__ == '__main__':
    app.run(debug=True)
Resources to Explore
- YouTube: End-to-End ML Project Tutorial
- Article: Complete Guide to Building ML Applications
- GitHub: Awesome Machine Learning Projects
End-to-end projects give you the full picture and practical skills to bring your ML ideas to life.
Stage 7: Specialization Paths
As you get comfortable with core machine learning concepts and real-world projects, it’s time to consider where you want to specialize. Specializations let you dive deeper into a field that matches your interests and career goals.
Popular specialization paths include:
Natural Language Processing (NLP)
Focuses on teaching machines to understand human language. Applications include chatbots, sentiment analysis, and language translation.
Computer Vision
Deals with interpreting images and videos. Think facial recognition, object detection, and medical image analysis.
Reinforcement Learning
Centers on training agents to make decisions through trial and error, popular in robotics and game AI.
Time Series Analysis
Involves forecasting and analyzing data points collected over time, useful in finance and weather prediction.
Big Data & Scalable ML
Focuses on handling massive datasets and deploying ML models at scale using tools like Apache Spark and cloud platforms.
Table: Specialization Paths Overview
| Specialization | Key Applications | Common Libraries/Tools | Recommended Resource |
|---|---|---|---|
| Natural Language Processing (NLP) | Chatbots, Sentiment Analysis, Translation | NLTK, SpaCy, Transformers (Hugging Face) | Stanford NLP Course |
| Computer Vision | Image classification, Object detection | OpenCV, TensorFlow, PyTorch | Fast.ai CV Course |
| Reinforcement Learning | Robotics, Game AI | OpenAI Gym, Stable Baselines | Deep RL Bootcamp |
| Time Series Analysis | Stock forecasting, Anomaly detection | statsmodels, Prophet, TensorFlow | Time Series with Python |
| Big Data & Scalable ML | Large datasets, Cloud ML deployment | Apache Spark, AWS SageMaker, Kubernetes | Big Data University |
Specializing helps you become an expert in an exciting niche. You’ll gain skills that are highly sought after in the industry and work on cutting-edge problems.
If you’re unsure which path to pick, try small projects or courses in each area to find what excites you most. The best specialization is one that keeps you motivated to learn and grow.
Essential Tools and Ecosystem
Getting your setup right early on helps your machine learning journey go smoothly. Here’s a breakdown of must-have tools, top data sources, and communities to join.
IDEs, Notebooks, and Version Control
| Tool Type | Examples | Why Use It | Learn More |
|---|---|---|---|
| IDEs | VS Code, PyCharm | Organize code, debug, and speed up development | VS Code Tutorial |
| Notebooks | Jupyter, Google Colab | Experiment interactively with code, docs, and visuals | Intro to Jupyter |
| Version Control | Git, GitHub | Track changes, collaborate, and backup code | Git & GitHub Basics |
Top Resources for Datasets
| Platform | Description | Link |
|---|---|---|
| Kaggle | Competitions, datasets, and kernels | https://www.kaggle.com/datasets |
| UCI Machine Learning | Classic datasets for ML research | https://archive.ics.uci.edu/ml/index.php |
| Google Dataset Search | Search engine for datasets across web | https://datasetsearch.research.google.com/ |
Community and Learning Platforms
| Platform | What You Get | Link |
|---|---|---|
| Kaggle | Competitions, tutorials, community notebooks | https://www.kaggle.com/ |
| GitHub | Host and share your projects, collaborate | https://github.com/ |
| Stack Overflow | Ask questions and get coding help | https://stackoverflow.com/ |
| Reddit (r/MachineLearning) | Discussions, news, advice | https://www.reddit.com/r/MachineLearning/ |
| Discord Servers | Real-time chats with ML communities | Search “Machine Learning Discord” for invites |
Conclusions
Here’s a quick summary of the most important points to remember as you build your machine learning journey:
Pros:
- Powerful Tools: IDEs like VS Code and Jupyter Notebooks make coding and experimentation easier and faster.
- Rich Dataset Resources: Access to diverse, high-quality datasets accelerates your learning and model performance.
- Vibrant Communities: Platforms like Kaggle and GitHub offer support, challenges, and collaboration opportunities.
- Version Control: Tools like Git keep your projects organized and help with teamwork.
Cons:
- Tool Overload: Too many options can feel overwhelming at first; focus on mastering a few key tools.
- Data Quality Issues: Not all datasets are clean or relevant, which can mislead your models.
- Steep Learning Curve: Engaging communities might sometimes assume prior knowledge, so beginners need patience.
- Dependency Management: Handling package versions and environments can cause frustration without good practices.
Balancing these pros and cons will help you stay focused and effective. Choose your tools wisely, lean on the community when stuck, and always prioritize clean data and good workflows. This approach will give you a solid foundation to grow as a confident machine learning practitioner.